Thursday, September 19, 2019

Lander time again!

 Lander Pants. I love this pattern by True Bias. The pattern is a high waisted wide leg cropped pant.
I lengthened the pattern by 8" as I wanted the hem to just skim the floor with flats.

I am wearing them with a MandyBoat Tee from Tessuti. 

My inner waistband is cut shorter than the outer so that the outer can wrap to the inside. I trimmed the facing 3/8" along the bottom so that I could finish it with Bias tape. 


I swapped the front pockets for some pockets that mimic sailor pockets. I also shaped the back pockets to match the front. 

 I went with a zipper fly.

The zip was too long so I shortened it by removing the bottom stop and putting it up where I need it 
to be. 


It's hard to see the front pockets, they blend right in. 


I really like knowing at a glance the pattern and when they were made. My Janome embroiders 
awesome labels!


Making jeans is a lot of work, but it sure is a lot of fun. Being able to create for your body, your size,
 your style. Pretty awesome. Sewing is my superpower. 

Stay Happy 
Keep Sewing
And if you can't sew, 
Stop and smell the roses. 


Sunday, April 21, 2019

Ginger jeans 4.0

Ginger jeans by @closetcasepatterns is a great fitting jeans pattern. I loved my 3.0 so much I knew I needed another. This pair is a light colored blue denim that reminds me of the 70's. My daughter picked up about 5 yards at goodwill.


I wanted to mimic a pair of high rise Levi's. I embroidered Handmade on a scrap of leather for the back waistband. My Janome makes this sew easy! I altered  the back pieces to be 1" taller and the back yoke 1" shorter. I lowered the pockets about 1".  I made the front interior pockets like Levi's and not extended all the way to center front. I am pretty happy with my result. Sewing truly is a super power.

I mimicked Levi's pocket tab, but in green.


My waistband lining and front pockets is from scraps of a vintage sheet 


I have begun embroidering the pattern and date in my jeans. Love this little touch. 


I split the side seam allowance about 10" above the hem so that it was ironed open. This makes for a cute roll up with my red serger thread.


My Janome 9450QCP has a 1 step buttonhole. You place your button in the back of the buttonhole attachment and it automatically makes your buttonhole the right size! 


I used Heather's buttonfly tutorial. It is a great tutorial. Easy to follow. 


                                                          I love my newest Gingers!


Sunday, January 13, 2019

Ginger 3.0

This is my Third pair of #Gingerjeans by @closetcasepatterns. This time in a 10 oz non stretch black denim from @Califabrics.

Heather's patterns are well drafted and her blog is full of tutorials for any questions you might have. This is the first time I have followed her zipper tutorial, I decided to try it as her button-fly tutorial is a keeper.


I loved the first pair I made in November, they were a 10 oz bull denim. Fit was great.
I put them on last week and ripped the butt. I almost cried. Either they shrank or I grew since before the holidays! I will be mending them, and they WILL fit again!


My second pair were cords. I love these AND they still fit.


My third pair are the charm. I love them. I traced the high rise combined with the stovepipe leg like my first pair. I added extra at the side seams to compensate for my non stretch fabric and for ease in fitting.


I hemmed then at 33 3/4" inseam. A tad long but room for shrinking.


  I embroidered a label.

 I tried topstitching with my CoverPro. Was hit or miss and messy on the inside. So the majority of topstitching I did on my Pfaff which is also my construction machine. Which means a lot of thread changes!


I raised the back pockets by 1/2" but they still look a tad low to me. 


I also embroidered a leather tag for the back. love those elephants! 


So if you haven't tried the Ginger jeans yet, I highly recommend! 

Stay Happy
Keep Sewing
and if you can't sew
Read a good book! 


Friday, January 11, 2019

Strathcona sweater

I am not the best knitter, but I really like it. Some things come out better than others and I don't always know why. This sweater came out better than I had hoped. It is the Strathcona sweater by Tara-Lynn Morrison of Good Night Day. She creates simple minimalist patterns. I bought this one through Ravelry. I fell in love with this one at first sight. It is knit in bulky yarn, so it knits up fast. I started it last weekend and finished it today. The hardest part was learning a tubular cast on that I just had to try. Took me many tries and quite a few You Tube videos. Worn here with my newest Landers.


Stay Happy
Keep Sewing
And if you can't sew 
KNIT!

Thursday, January 10, 2019

New Year, New Landers

New Year brings about a time for thoughtful change. I want to lend this change to my sewing. I began a journal with this years new sewing. I want to be present and thoughtful in my sewing. Not in a hurry to get done, without thoroughly being present and enjoying the whole process. It will also provide a documented history of each make, which hopefully will be valuable for future makes. 

I am sure my journaling will change as I move through this process. I am looking forward to that as well.
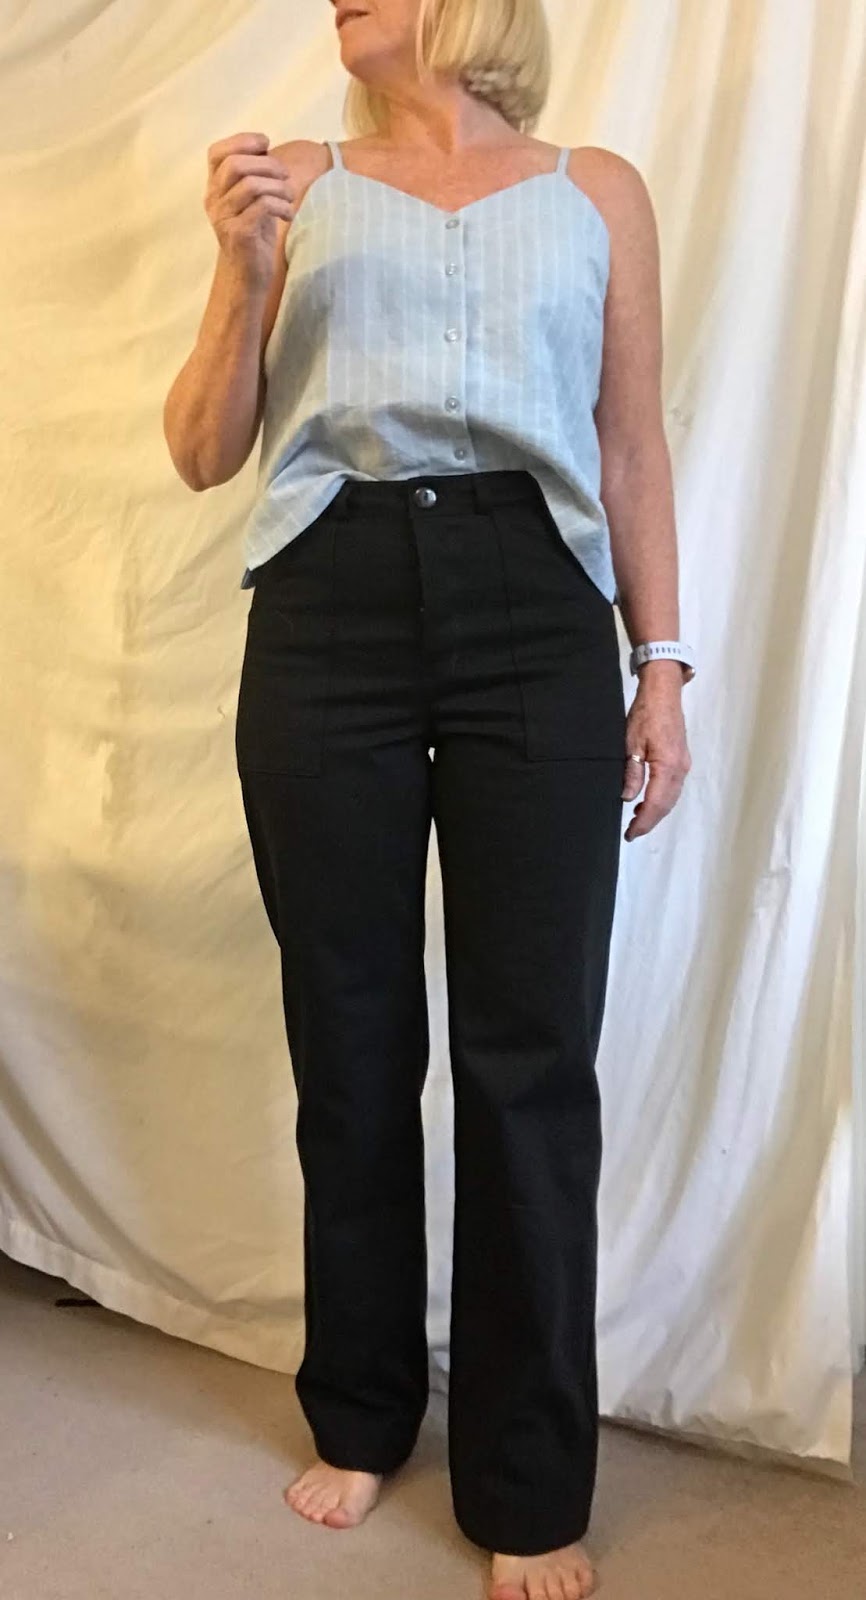
My first make this year is a pair of Landers. @truebias I believe this will be my third. I have a cropped black denim, a skinny leg denim and this pair is a bull denim from Cali Fabrics. 


I first thought that this would be a longer cropped version. So I added 1 1/4" to the length to play with  
  while cutting them out.
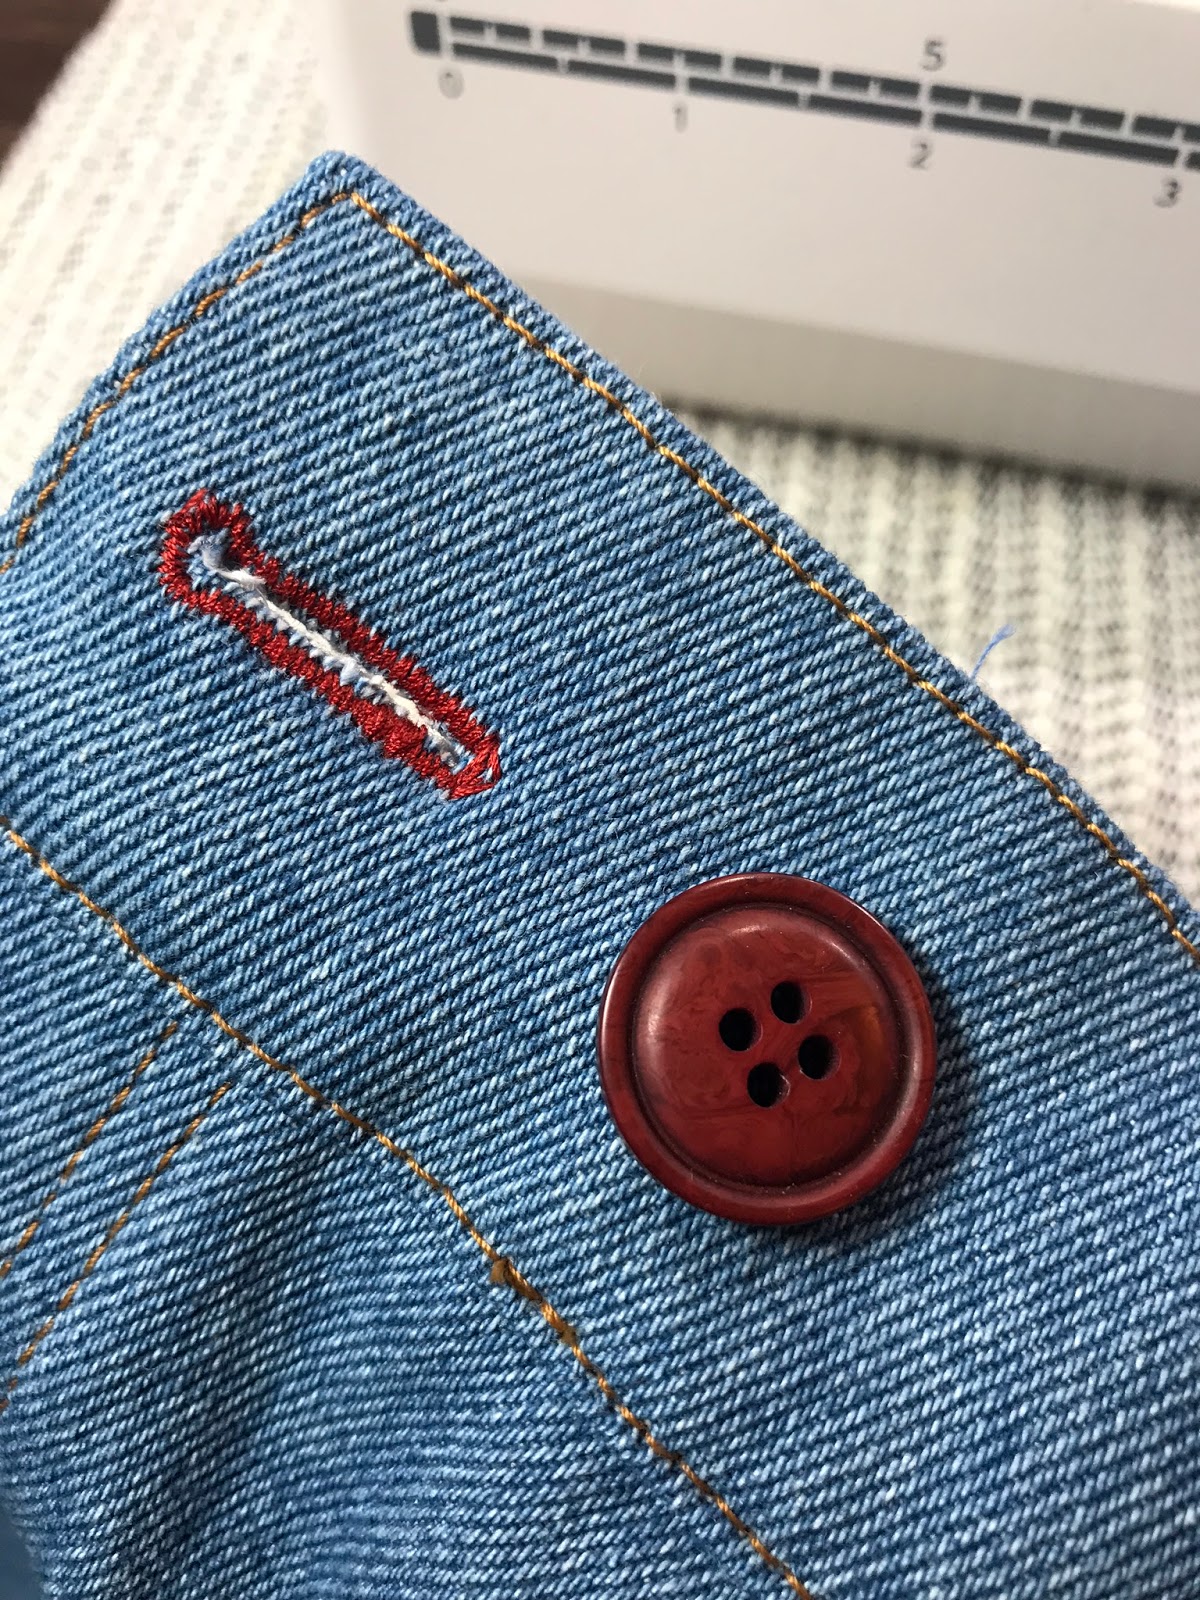
I love a button fly. I used Heather Lou's tutorial (closet Case Patterns).


When attaching the buttons, I like to ensure there 
will be enough slack for easy buttoning. To do this I 
place an old needle vertically under the button and 
leave it there will attaching the button. I use a 
horizontal pin to mark the placement I need. I used 

rolled up scotch tape to hold the button  in place so 
that I can get it all under my pressed foot. Once 
attached, I thread the 
threads onto a needle and pull them to the back of the fabric and tie them off.


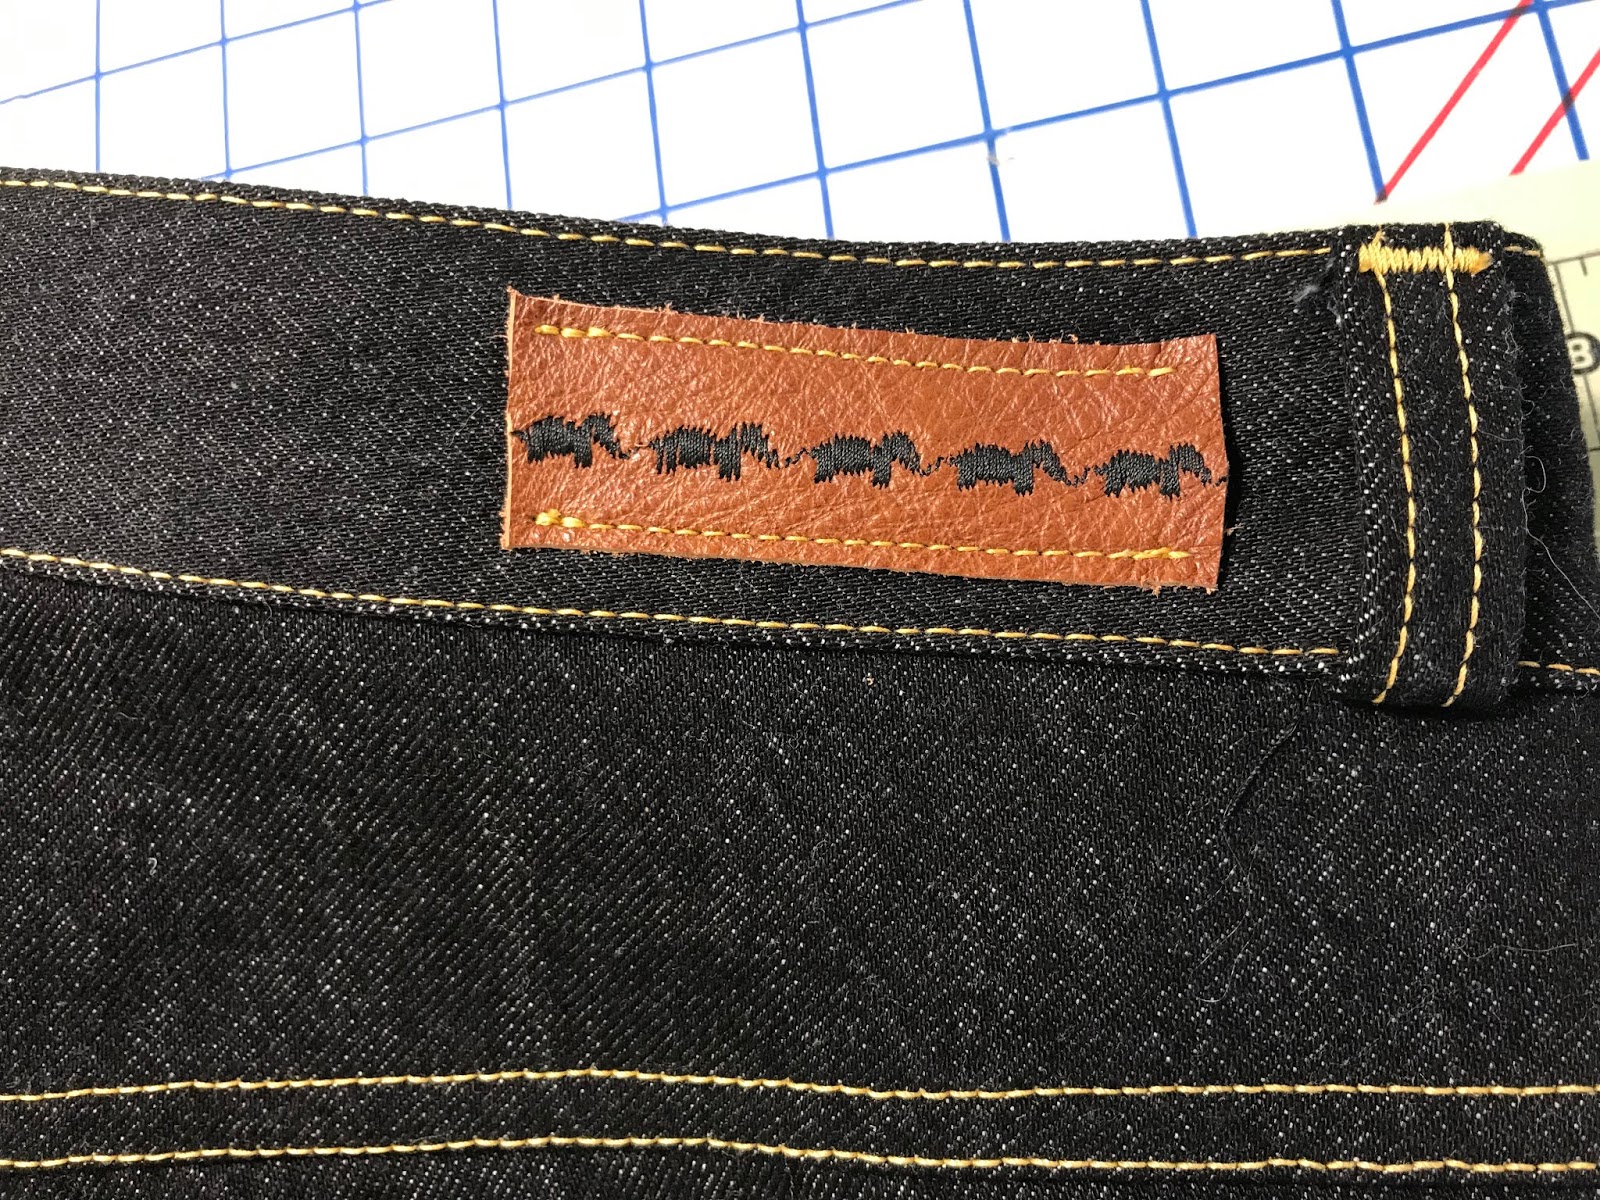
Following the idea from Johanna Lou of the Last 
Stitch - I used my coverstitch machine to make the belt loops. I have a Cover Pro 1000 CP by Janome and don't use it often enough. I had to do a couple 
test runs to get the tension right, but it was a lot easier than I thought it would be.


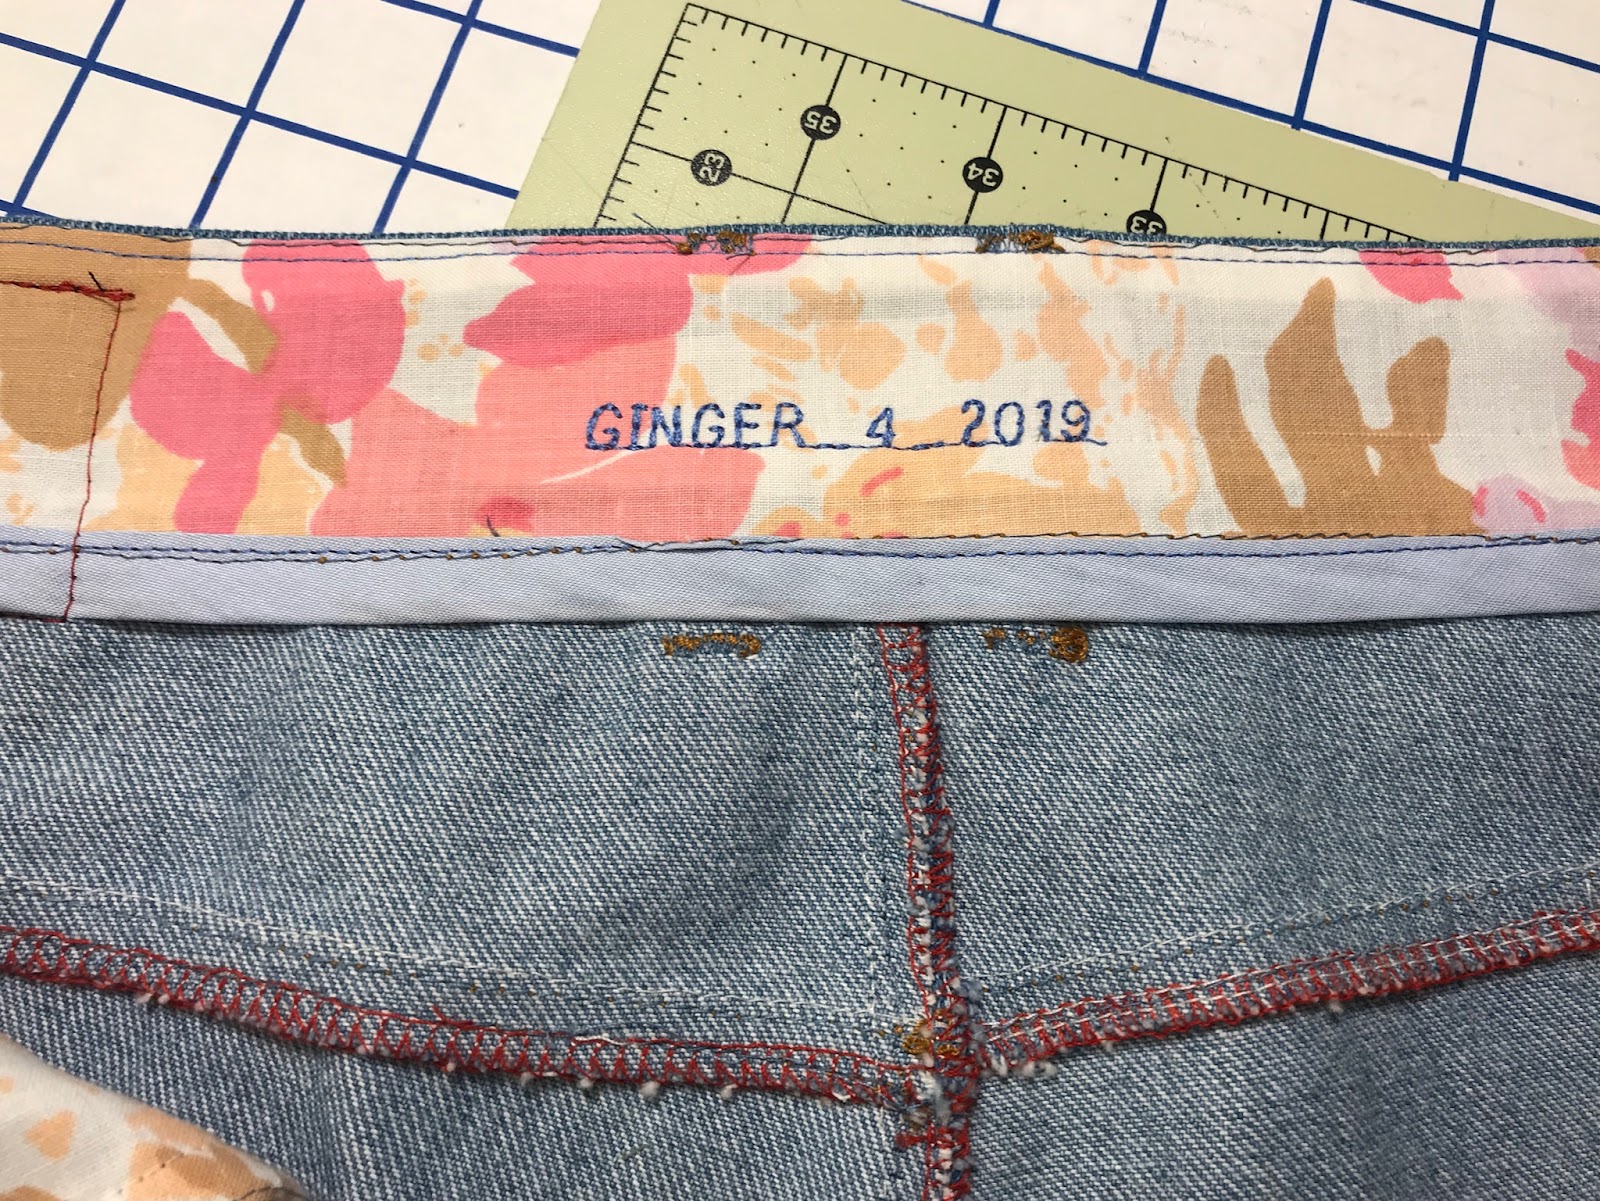
I machine embroidered Landers 2019 on my waistband facing. The R embroidered on top of the E but I am Good with that. Lol.


Once I tried on my pants, I decided I liked the exact length they were, which meant I had no fabric for a hem! So I added 2 1/2" to each leg to use as the 
hem.


They ended up the perfect length. So in all, these are 7 3/4" longer than the original pattern. I really like the look of the long fuller leg.


So first make of the new year is complete. I 
thoroughly enjoyed the whole process and I believe that these are my favorite #landerpants yet!
Stay Happy
Keep Sewing
And if you can't sew

Knit!